
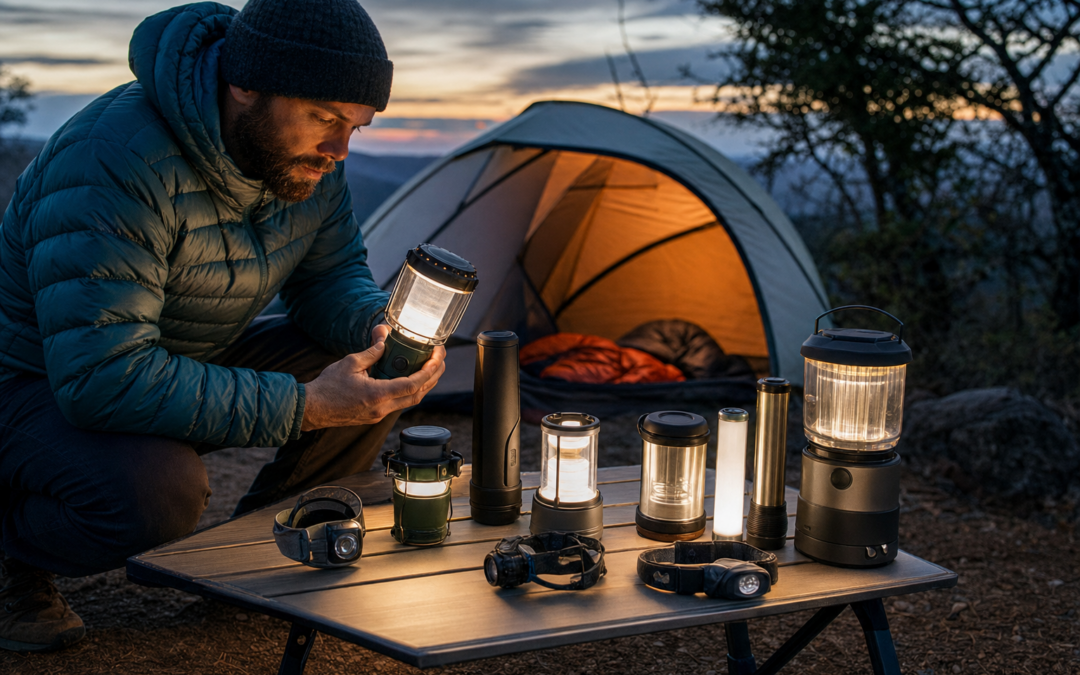
When you’re planning a camping trip, the right camp lighting can make all the difference between a cozy, well-lit night and a frustrating, shadowy experience. Whether you’re navigating trails after dark, cooking at your site, or reading in your tent, choosing the best lights isn’t just about brightness—it’s about matching features to your real needs. With so many options on the market—headlamps, lanterns, flashlights, and more—it’s easy to feel overwhelmed. That’s where a practical buying framework comes in handy.
This guide breaks down the key factors to consider when shopping for camp lighting, focusing on lumens, battery types, light modes, and other practical aspects. We’ll walk you through a step-by-step process so you can confidently choose the right gear for your next adventure. If you want more on gear selection, check out our comprehensive buying guides hub for campers.
Understanding Lumens: How Much Light Do You Really Need?
Lumens measure the total amount of visible light a device emits. It’s tempting to think that higher lumens always mean a better camp light, but that’s not always the case. The “right” brightness depends on your main use cases:
- Headlamps for hiking or tasks: 100–300 lumens is usually sufficient for trail walking, setting up camp, or cooking.
- Lanterns for group areas: 200–600 lumens is ideal for illuminating picnic tables, tents, or cooking stations.
- Flashlights for spotting: 300–1000+ lumens offer focused beams for seeing long distances or searching.
Be wary of extremely high-lumen claims on budget lights—they often sacrifice battery life or are measured in short bursts. Consider whether you need a flood beam (wide area) or spot beam (long distance). For most campers, a mix of wide and focused lighting covers all scenarios.
Battery Types: Rechargeable vs. Disposable
Battery choice impacts weight, convenience, and long-term cost. Here are your main options:
- Rechargeable (Lithium-ion or Li-poly): Found in most modern headlamps and high-end flashlights. They save money over time and reduce waste, plus many recharge via USB.
- Alkaline (AA, AAA): Still common in budget lights and some lanterns. Widely available but can be heavy and costly over time.
- Hybrid: Some lights accept both rechargeables and disposables. This is useful for backup power in emergencies.
For regular campers, rechargeable lights are generally more practical. If you’ll be off-grid for several days, bring a power bank or solar charger, or choose a light with both battery types.

Lepro LED Headlamp Rechargeable IPX4 Waterproof Headlight 5 Modes Review — A Lepro pick in Headlamps that focuses on real-world usability Key figures include 5 , 3 Levels, 30 hours.
Beam Patterns: Flood vs. Spot
The shape of the light beam matters as much as brightness. Here’s how to choose:
- Flood beams cast a wide, even light—great for tasks, cooking, or lighting up tents and campsite areas.
- Spot beams are narrow and intense. They reach farther, making them ideal for navigation, signaling, or searching.
- Adjustable beams let you toggle between flood and spot, offering flexibility for different scenarios.
Headlamps and flashlights often include adjustable focus. For group lighting, lanterns with 360-degree beams are best. Consider your main activity to prioritize beam type.
Lighting Modes: More Than Just On/Off
Modern camp lights offer multiple modes. While it seems like a gimmick, modes can extend battery life and improve usability:
- High/medium/low: Lets you dial in the brightness for the task and save power when you don’t need full output.
- Red light: Preserves night vision—useful for late-night reading or map work without disturbing others.
- Strobe/SOS: Emergency signaling features, especially useful on trails or in remote areas.
Choose lights with simple, intuitive controls. Complicated button sequences can be frustrating in the dark or with gloves on.

Lepro Lighting Ever LED Flashlight Review — Practical emergency supplies from Lepro, summarized from hub features and listed measurements. Key figures include 4.2in, 1.2, 492ft.
Water Resistance and Durability
Campsites are unpredictable—rain, spills, and drops are common. Check the IP (Ingress Protection) rating on camp lights:
- IPX4: Splash resistant—fine for most camping, but not for submersion.
- IPX7: Can survive immersion up to 1 meter—choose this for canoeing, kayaking, or heavy rain.
- Shock resistance: Some lights are drop-tested; look for this if you’re rough on gear or camping with kids.
Plastic housings are lightweight, but aluminum or reinforced cases add toughness. For family or group camping, prioritize durability—accidents happen!
Size, Weight, and Packability
Space and weight are at a premium, especially for backpackers. Here’s how to judge:
- Headlamps: Lightweight models (1–3 ounces) are ideal for hiking. Bulkier headlamps may offer more features but add weight.
- Handheld flashlights: Compact models fit in pockets; larger ones may have longer battery life or more lumens.
- Lanterns: Collapsible or inflatable lanterns save space; rigid models are tougher but bulkier.
Consider how you’ll carry and store your light. If you’re car camping, size matters less than for backpacking. For multi-night trips, lighter is usually better.
Ease of Use: Controls and Ergonomics
Fumbling with tiny switches or complicated sequences is the last thing you want at night. Look for lights with:
- Large, glove-friendly buttons: Easy to find and operate in the dark or cold.
- Simple mode cycling: Ideally, one button for power and another for mode selection.
- Tilt adjustment (for headlamps): Lets you aim the beam without moving your head.
- Battery indicators: Shows remaining charge so you’re not left in the dark unexpectedly.
Test new lights before your trip, and teach kids or new campers how to use them. Familiarity prevents nighttime frustration.

TrixHub Rechargeable Flashlights Super Bright High Lumens Flashlight Review — A TrixHub pick in Handheld Flashlights that focuses on real-world usability Key figures include 5 , 2 Pack, 5.9 .
Special Features: Charging, Mounting, and More
Today’s camp lights come with a range of bonus features. Consider these extras based on your needs:
- USB charging: Lets you recharge from power banks, solar panels, or car outlets.
- Magnetic base or clips: Useful for hands-free lighting—attach to tent poles, car hoods, or metal camp tables.
- Integrated hooks or loops: Essential for hanging lanterns inside tents or on tree branches.
- Lockout mode: Prevents accidental activation in your pack, saving battery.
Not every feature is necessary, but some (like hanging hooks or USB-C charging) make a big difference in convenience. Think about your camp setup and activities when prioritizing features.
Types of Camp Lighting: Headlamps, Lanterns, and Flashlights
Each type of camp light excels in different scenarios:
- Headlamps: Best for hands-free tasks and hiking. Lightweight, compact, and easy to direct where you’re looking.
- Handheld flashlights: Offer powerful, focused beams for navigation, emergencies, or spotting wildlife at night.
- Lanterns: Provide 360-degree light for group spaces—ideal for cooking, games, or eating together.
Many campers bring one of each: a headlamp for personal use, a flashlight for emergencies, and a lantern for communal areas. If you’re choosing just one, prioritize based on your most common activity.
How to Compare Camp Lights: Practical Testing and Specs
Specs only tell part of the story. Here’s how to evaluate lights in the real world:
- Test battery life: Run your light at different modes and see how long it actually lasts versus what’s advertised.
- Check beam quality: Use it outside at night—does it light up what you need? Are there dark spots or color distortion?
- Assess comfort: Wear headlamps for an hour. Is the strap comfortable? Does it slip?
- Try mounting and hanging: Can you easily attach or hang lanterns? Do flashlights fit your hand or pocket?
Online reviews and user feedback can help, but nothing beats hands-on testing. If you’re buying online, check return policies in case your pick isn’t a match.
Budgeting: What to Spend and Where to Save
Camp lighting comes in a wide price range. Here’s how to budget wisely:
- Headlamps: $15–$40 covers most needs. Spend more for longer battery life or specialty features.
- Flashlights: $10–$50 for solid performance. Higher-end models offer extra brightness or durability.
- Lanterns: $20–$60, depending on size and features. Rechargeable models may cost more up front but save on batteries.
It’s worth investing a bit more in your primary light (the one you use the most). For backups or kids, budget models are fine. Don’t forget the cost of extra batteries or chargers.
Camp Lighting Safety Tips
Once you’ve chosen your lights, follow these tips for safe and effective use:
- Never shine bright beams directly in eyes: This can cause temporary blindness, especially with high-lumen lights.
- Store batteries separately in hot weather: Prevents leaks or accidental activation.
- Keep lights dry and clean: Wipe off mud or condensation after use to prevent corrosion.
- Bring backups: Always have at least one extra light per group in case of failure.
- Teach everyone how to use the lights: Especially important for kids or new campers.
Good lighting is a key part of camp safety—don’t overlook its role in navigation, wildlife deterrence, and emergency signaling.
Recap: Building Your Camp Lighting Kit
To sum up, the best camp lighting kit is one matched to your activities, group size, and trip duration. Start with your main needs—personal headlamp, communal lantern, or emergency flashlight—and build from there. Focus on lumens, battery type, beam pattern, and durability for the best fit.
- Choose rechargeable lights when possible for cost savings and convenience.
- Look for multiple lighting modes to suit different tasks and conserve power.
- Evaluate size, ergonomics, and mounting options for your camp setup.
- Don’t forget spare batteries or a power bank if you’ll be off-grid for long periods.
By following this framework, you’ll avoid common pitfalls and end up with lighting gear that makes every night outdoors safer and more enjoyable. For more recommendations and in-depth gear breakdowns, visit our main buying guides hub.
Essential Camp Lighting Checklist
Before heading out on your next camping trip, use this checklist to ensure your camp lighting setup is complete and reliable. Planning ahead will help you avoid common pitfalls and guarantee you have the right illumination for any situation:
- Primary light source: Headlamp, lantern, or flashlight appropriate for your main activities.
- Backup light: Always pack a second light in case of failure or loss (even a simple keychain light).
- Extra batteries or power bank: Bring sufficient batteries or a USB power bank for charging, especially for multi-day trips.
- Charging cables: Double-check that you have the correct cables for any rechargeable lights.
- Red light/night vision mode: Useful for late-night tasks or preserving night vision.
- Spare bulbs (if applicable): Some older lanterns and flashlights still use replaceable bulbs.
- Waterproof/dustproof rating: Ensure your gear can withstand the expected weather (look for IPX4 or higher).
- Mounting options: Check for hooks, magnets, or stands for hands-free use around camp.
- Glow-in-the-dark markers or reflective tape: Helps you locate your lights in the dark.
- User manual: For complex lights, bring the manual or download the PDF to your phone.
Review this checklist before each trip and adjust based on your group size, trip length, and environment.
Common Mistakes When Buying Camp Lighting
Choosing camp lighting may seem straightforward, but there are several common mistakes that can lead to frustration or even safety issues. Here are the pitfalls to avoid:
- Overvaluing maximum lumens: Many buyers pick the brightest light available, but ultra-bright lights can be blinding at close range and drain batteries quickly. Match brightness to your real needs.
- Ignoring beam pattern: A powerful spot beam won’t help much inside a tent or around a picnic table. Think about where and how you’ll use the light.
- Overlooking battery compatibility: Not all batteries are available everywhere. If you’re camping internationally or in remote areas, make sure you can get replacements or recharge as needed.
- Choosing complicated controls: Multi-mode lights with confusing button sequences can be difficult to operate in the dark or with gloves. Simpler is often better.
- Neglecting weatherproofing: A light with poor water resistance might fail in the rain or after accidental drops in puddles. Look for an IPX4 (splash-proof) rating or higher.
- Forgetting about weight and size: Bulky lanterns or heavy flashlights can be a burden, especially for backpackers.
- Not testing before the trip: Always check your lights at home to ensure they work and that you understand their functions.
By avoiding these mistakes, you’ll be better prepared and more satisfied with your camp lighting choices.
Maintaining and Caring for Your Camp Lights
Proper maintenance helps your lights last longer and ensures they work when you need them most. Here are some key tips for keeping your camp lighting in top shape:
- Clean regularly: Wipe down your lights after each trip to remove dirt, dust, and moisture. Avoid harsh chemicals that can damage the lens or housing.
- Check battery contacts: Corrosion can build up, especially if batteries are left inside for long periods. Remove batteries during storage and clean contacts with a dry cloth or a cotton swab.
- Inspect for damage: Look for cracks, broken seals, or loose parts. Replace or repair as needed, especially if water resistance may be compromised.
- Store in a dry place: Keep your lights and batteries in a cool, dry location when not in use. Use a dry bag or case for extra protection during transport.
- Recharge before trips: Make it a habit to fully charge all rechargeable lights before leaving home.
- Test all modes: Cycle through lighting modes to ensure switches and electronics function correctly.
- Replace old batteries: If using alkalines or other disposables, don’t risk using old batteries that may leak or fail.
Well-maintained camp lights are more reliable and safer. A little attention after each trip goes a long way.
Frequently Asked Questions About Camp Lighting
How many lumens do I need for camping?
For most campers, 100–300 lumens is plenty for hiking or general tasks, while 200–600 lumens works well for group lanterns. If you need to spot wildlife or signals at a distance, 300–1000+ lumens may be necessary. Too much brightness can reduce battery life and annoy campmates, so match the output to your activity.
Are rechargeable camp lights better than those using disposable batteries?
Rechargeable lights are more eco-friendly and cost-effective in the long run, especially for frequent campers. However, disposable batteries can be useful as a backup or for remote trips where charging isn’t possible. Many modern lights accept both for added flexibility.
What is the best type of camp light for inside a tent?
Lanterns with a soft, diffuse beam are ideal for tents, as they provide even illumination. Hanging lanterns or small LED tent lights with adjustable brightness are especially convenient. Headlamps on low mode can also work if you need hands-free lighting.
How important is water resistance in camp lights?
Water resistance is crucial, as camp lights are often exposed to rain, dew, or accidental drops. Look for at least an IPX4 rating (splash-proof). For kayaking or wet environments, consider IPX7 (submersible) or higher.
Should I bring more than one light source?
Yes, always have a backup. Headlamps are great for hands-free tasks, but a lantern is better for group areas, and a flashlight can help with navigation or emergencies. Having at least two types of lights is recommended for safety and convenience.
What lighting modes are actually useful?
Low, medium, and high brightness settings let you conserve power and adapt to the situation. Red light is helpful for night vision, and strobe or SOS modes are valuable for emergencies. Avoid lights with overly complex mode cycles that are hard to operate in the dark.
How do I maximize battery life on a camping trip?
Use low or medium modes whenever possible and turn off lights when not in use. Recharge during daylight with a solar panel or power bank, and carry extra batteries if needed. Cold weather can drain batteries faster, so keep spares in a warm pocket.
Are solar-powered camp lights reliable?
Solar-powered lights can be a great supplement, especially for ambient tent or area lighting. However, they depend on sunlight and may not charge fully in cloudy conditions. Always have a backup or alternate charging method.
Can I use regular household LED lights for camping?
Household LEDs are not designed for outdoor use, lack water resistance, and may not be durable enough for camp life. It’s best to choose lighting made specifically for camping, with appropriate ruggedness and features.
How do I safely dispose of old camp light batteries?
Do not throw batteries in the regular trash. Take spent batteries to a recycling center or hazardous waste facility. Many outdoor retailers also offer battery recycling bins.
Tips for Choosing the Right Camp Lighting for Your Trip
Every camping adventure is different, so the best lighting setup depends on your destination, group size, and planned activities. Here are some quick tips to help you choose:
- Backpackers: Prioritize lightweight, compact, and rechargeable headlamps. Minimalist lanterns or string lights can add comfort for little weight.
- Family/group campers: Bring at least one large lantern for shared spaces, plus individual headlamps or flashlights for each person.
- Car campers: Bulky or high-capacity lanterns are fine. Consider string lights or motion-activated options for extra ambiance and safety.
- Winter campers: Cold drains batteries—choose lithium batteries and keep lights warm. Higher lumens may be needed for longer nights.
- Remote/off-grid trips: Hybrid battery options and solar chargers are smart. Carry more spares than you think you’ll need.
Think about your routines at camp—cooking, reading, exploring, or relaxing—and match your lighting gear accordingly. A little planning makes your nights safer and much more enjoyable.