Shopping for a camping tent can feel overwhelming with the sheer number of choices and technical specs. Whether you’re a seasoned backpacker or a family camper looking to upgrade, the right tent can make or break your outdoor experience. Understanding what matters most—like capacity, seasonality, and must-have features—streamlines the process and ensures you pick a tent that matches your style, group size, and the conditions you’ll face.
This comprehensive guide walks you through each tent buying consideration, from sizing and weatherproofing to smart add-ons and real-world usability. We’ll help you cut through the marketing jargon and focus on specs and features that genuinely impact your comfort and safety. Along the way, you’ll find practical tips, honest advice, and specific product callouts to help you make a confident decision.
Understanding Tent Capacity: How Many People Will Really Fit?
One of the first things you’ll notice when shopping for a tent is the capacity rating—2-person, 4-person, 6-person, and so on. But these numbers can be misleading. Manufacturers base them on a tight fit, with campers lying side by side like sardines, often with little room for extra gear or personal space. If you value elbow room, plan to size up.
- Solo or duo camping: A two-person tent will fit two standard sleeping pads with little leftover space. For solo campers who want gear inside, a two-person tent offers comfort, while a one-person tent is strictly minimalist.
- Family or group trips: For families, always size up at least one person beyond your group size. For four people, a six-person tent offers breathing room and space for bags, especially important with kids.
- Backpacking vs. car camping: Backpackers may prioritize a smaller, lighter tent and accept the squeeze. Car campers can afford the luxury of a roomier tent since weight isn’t a major concern.
Remember to consider the footprint of sleeping pads, extra gear, and how much personal space each camper needs to sleep comfortably. When in doubt, go bigger for comfort—especially on longer trips or with restless sleepers.
Seasonality: 3-Season vs. 4-Season Tents
The next major consideration is weather suitability. Tents are classified by their seasonal rating, which affects their warmth, ventilation, and ability to handle wind, rain, or snow.
- 3-season tents: Designed for spring, summer, and fall, these are the most popular and versatile. They offer a balance of ventilation and weather protection, with mesh panels for airflow and a rainfly for moderate rain and wind. They’re not built for heavy snow or extreme conditions.
- 4-season tents: Built for winter conditions, with fewer mesh panels, sturdier poles, and lower, more enclosed profiles to shed snow and block wind. They’re heavier and less ventilated, making them overkill for most summer trips—but essential for alpine or winter camping.
- Convertible tents: Some tents offer removable panels or extra poles to transition between seasons. These can be a good investment if you camp year-round, but they’re heavier and more expensive.
For most US campers, a quality 3-season tent will suffice. Only choose a 4-season tent if you expect snow, strong winds, or cold temperatures below freezing.
Tent Shape and Design: Dome, Cabin, and Tunnel Styles
The shape of your tent affects its headroom, stability, and suitability for different camping styles. Here are the main types you’ll encounter:
- Dome tents: Most common and versatile. Two or more crossing poles create a freestanding structure that’s easy to set up. They offer good wind resistance and moderate headroom (taller at the center).
- Cabin tents: Feature near-vertical walls, maximizing interior space and standing height—excellent for families or car camping. However, they’re bulkier, heavier, and less stable in strong winds.
- Tunnel tents: Use parallel poles to create a tunnel-shaped shelter. These are spacious and lightweight, but typically require staking and are more vulnerable to crosswinds.
Consider your priorities. If you want to stand up and move around, cabin tents are ideal. For backcountry trips or windy sites, dome tents offer a great balance of stability and ease of setup. Tunnel tents work for lightweight family camping, provided you’re not expecting high winds.
Pole Materials and Tent Fabrics: Weight, Strength, and Durability
The materials used in your tent’s poles and fabric directly impact its weight, strength, and longevity. Here’s what to look for:
- Poles:
- Aluminum: Strong, lightweight, and widely used in quality tents. Aluminum poles are resilient and repairable in the field.
- Fiberglass: Cheaper, heavier, and more prone to breakage. Acceptable for occasional car camping but not recommended for serious use.
- Composite or carbon fiber: High-end options for ultralight or expedition tents, offering excellent strength-to-weight ratios at a premium price.
- Fabrics:
- Nylon: Common for tent canopies and rainflies, nylon is lightweight and strong. Look for ripstop weaves for added durability.
- Polyester: Heavier but more UV-resistant. Found in budget and car camping tents.
- Denier rating: Higher denier numbers mean thicker, tougher fabric. For floors, 70D or higher resists abrasion best.
- Waterproof ratings: Measured in millimeters (e.g., 1500mm or 3000mm). For rainflies, 1500mm+ is a good baseline. Floors should be 2000mm+ for wet ground.
Choosing the right materials depends on your intended use. Backpackers should prioritize aluminum poles and lightweight ripstop nylon. Car campers can opt for heavier materials if it means more comfort or a lower price.
Doors, Vestibules, and Storage: Living Space and Gear Management
The number and placement of doors, vestibules, and interior pockets can make a huge difference in daily comfort and convenience, especially with multiple campers or gear-heavy trips.
- Doors: Two doors are better than one for groups, allowing easy entry and exit without crawling over others. Look for doors that are easy to zip with one hand and have storm flaps for rain protection.
- Vestibules: These sheltered spaces outside the main sleeping area are essential for storing boots, packs, and wet gear. Larger vestibules offer more usable space for cooking in a pinch or keeping gear dry.
- Pockets and gear lofts: Interior mesh pockets and overhead gear lofts help organize small items, like headlamps, glasses, or phones, so they’re always within reach.
Prioritize these features if you expect to camp in wet climates, have a lot of gear, or value a tidy, organized sleeping area. For more advice on organizing your campsite, see our camping buying guides.

Durable Hammock 400 lb Capacity, Nylon Camping Hammock Chair Review — An editorial look at this SEWANTA option for hammocks — specs first, marketing second. Key figures include 400 lbs, 500 lbs, 10 .
Ventilation and Condensation Management
Good ventilation is critical for staying dry and comfortable in any tent. Without it, condensation from your breath and body heat can build up, making the interior damp—even in dry weather. Here’s what to check:
- Mesh panels: Look for tents with large mesh windows, doors, and ceilings, especially if you camp in warm or humid areas.
- Adjustable vents: Many rainflies include vents that can be propped open to promote airflow while keeping out rain.
- Double-wall construction: Most quality tents have a mesh inner tent and a separate rainfly, which helps moisture escape while blocking rain and wind.
Single-wall tents (often used for ultralight or mountaineering) can trap more condensation, so only choose these for specific, dry-weather needs. For most campers, prioritizing mesh and adjustable ventilation points is the best way to stay comfortable year-round.
Ease of Setup: Freestanding vs. Non-Freestanding Tents
How quickly and easily you can pitch your tent matters, especially after a long day of hiking or when bad weather rolls in. There are two main categories:
- Freestanding tents: These hold their shape without stakes, making them easy to move and set up on almost any surface. Most dome and cabin tents are freestanding, and they’re the best choice for convenience or for pitching on rocky or hard-packed ground.
- Non-freestanding tents: Rely on stakes and guylines to maintain their shape. Tunnel tents and some ultralight models fall into this category. They’re lighter but require more skill and suitable ground for pitching.
- Color-coded poles and clips: Many modern tents feature color coding, which speeds up set up and minimizes confusion—especially in low light.
If you’re new to camping, prefer simplicity, or expect to set up in tough conditions, a freestanding tent is your best bet. Practice pitching your tent at home before your first trip to avoid surprises at the campsite.

Kootek Camping Hammock 400lbs Capacity Outdoor Camping Essentials Review — A Kootek pick in Hammocks that focuses on real-world usability Key figures include 18, 1 , 400 lbs.
Weight and Packed Size: Backpacking vs. Car Camping
The importance of tent weight and packed size depends on how you camp. Backpackers need to shave ounces wherever possible, while car campers can afford a little extra for comfort and space.
- Backpacking tents: Aim for 2 to 4 pounds per person, including poles, rainfly, and stakes. Ultralight tents can drop below 2 pounds, but may sacrifice durability or space.
- Car camping tents: Weight and packed size are less important. Prioritize spaciousness, features, and ease of setup—even if it means a 20- or 30-pound tent.
- Group trips: Consider splitting tent components (poles, rainfly, body) among hikers to distribute weight evenly.
Check the packed dimensions, too. Smaller tents are easier to fit in a backpack or trunk. If you plan to hike with your tent, be realistic about what you can comfortably carry over several miles.
Weather Resistance: Waterproofing, Wind Stability, and UV Protection
Even fair-weather campers should prepare for rain, wind, and sun. A tent’s ability to withstand the elements is determined by several factors:
- Rainfly coverage: Full-coverage rainflies offer the best protection from rain and wind. Partial rainflies leave the lower walls exposed and are best for dry climates.
- Hydrostatic head rating: The higher the rating (measured in mm), the more waterproof the fabric. Look for at least 1500mm for rainflies and 2000mm+ for floors.
- Seam sealing: Factory-taped or sealed seams prevent leaks. If not, apply seam sealer before your trip.
- Guyout points and sturdy stakes: More guyout points mean better wind resistance. Quality stakes are less likely to bend or pull loose in storms.
- UV resistance: Polyester fabrics are naturally more UV resistant, but all tents should be stored out of direct sunlight when not in use to prevent degradation.
If you expect frequent storms or unpredictable weather, invest in a tent with robust waterproofing and plenty of guyout points. Always test your tent in the backyard with a hose before heading out for the first time.
Additional Features and Accessories Worth Considering
Once you’ve narrowed down your choices based on capacity, seasonality, and weather resistance, consider these extra features that can boost comfort and convenience:
- Footprints: Custom-fitted ground cloths protect your tent floor from abrasion and moisture. Some tents include them, others sell them separately.
- Integrated LED lighting: Some family tents offer built-in lights for nighttime convenience, though a simple lantern or headlamp works fine.
- Room dividers: Larger tents may include removable dividers for privacy or to separate sleeping and living areas—helpful for families or groups.
- E-port access: If you camp at developed sites with electricity, look for tents with power cord access ports.
- Reflective guylines and zipper pulls: These are a small but helpful feature for avoiding trip hazards and finding your tent at night.
While not strictly necessary, these add-ons can improve your camping experience, especially on longer trips or with larger groups.
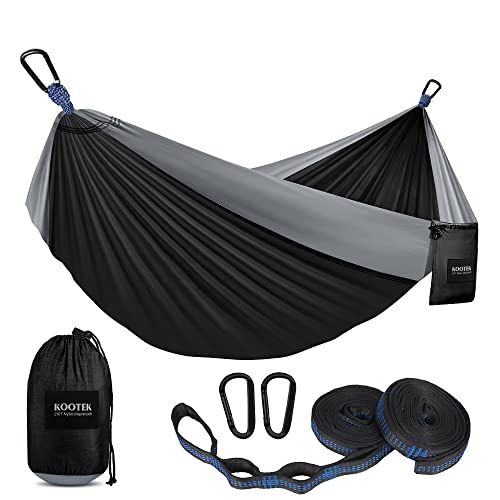
Kootek Camping Hammock 500lbs Capacity Outdoor Camping Essentials Review — Kootek hammocks gear aimed at buyers who want clear specs before they click through. Key figures include 18, 1 , 500 lbs.
Budget Considerations: Where to Spend and Where to Save
Tent prices range from budget-friendly to premium, but you don’t have to spend a fortune for a reliable shelter. Here’s how to allocate your budget wisely:
- Spend more on: Quality materials (aluminum poles, ripstop nylon), solid waterproofing, and reliable zippers. These affect durability and weather protection most.
- Save on: Extra features like built-in lighting, oversized vestibules, or brand-name cachet—unless you know you’ll use them regularly.
- Watch for: Seasonal sales (spring and fall), last year’s models, or gently used tents from reputable sources if you want to maximize value.
Above all, match your tent to your actual camping style. There’s no need for a four-season mountaineering tent if you only camp in the summer at state parks. Prioritize the features you’ll use most often, and invest in durability where it counts.

1 MIDDLE ONE Travel Pillow for Sleeping Camping Review — Practical travel pillows from 1 MIDDLE ONE, summarized from hub features and listed measurements. Key figures include 15.5, 1 , 01.
Practical Tips for Testing and Maintaining Your Tent
Before heading out on your first camping trip, take time to test and care for your tent. Here’s how to get the most from your investment:
- Practice setup: Pitch your tent at home (indoors or in your yard) to familiarize yourself with the process and check for missing parts or defects.
- Waterproofing: Even factory-sealed tents may benefit from a fresh coat of seam sealer or waterproof spray, especially after several uses or in high-wear areas.
- Storage: Always dry your tent completely before storing to prevent mildew. Store loosely in a breathable bag rather than compressed in its stuff sack for long periods.
- Repairs: Bring a small repair kit (duct tape, pole splints, extra stakes) on every trip. Many manufacturers offer replacement parts or repair services for quality tents.
- Cleaning: Use mild soap and cold water to clean your tent. Avoid harsh detergents, and never machine wash or dry.
Regular maintenance ensures your tent will last for years and perform reliably in all conditions. If you’re new to camping, these habits will save you frustration and money down the line.
Summary: Building Your Tent Buying Checklist
Buying the right tent is about balancing your specific needs—group size, weather, weight, and convenience—against your budget. Here’s a quick checklist to use when comparing options:
- Choose a capacity that matches your group, then size up for comfort.
- Pick a seasonality rating (3-season or 4-season) that fits your climate and camping style.
- Decide on a tent shape—dome for versatility, cabin for space, tunnel for lightweight family camping.
- Opt for quality materials: aluminum poles, ripstop nylon or polyester, and solid waterproofing.
- Prioritize ventilation, easy setup, and practical storage features like vestibules and pockets.
- Weigh packed size and weight against your mode of travel (backpacking vs. car camping).
- Look for extras—footprints, dividers, e-ports—based on your preferences and trip length.
- Test your tent before your trip and maintain it properly for long-lasting performance.
Armed with this framework and real-world advice, you’ll be able to cut through the hype and pick a tent that delivers on your next adventure. For more gear-specific breakdowns and honest reviews, browse our main camping buying guides hub.