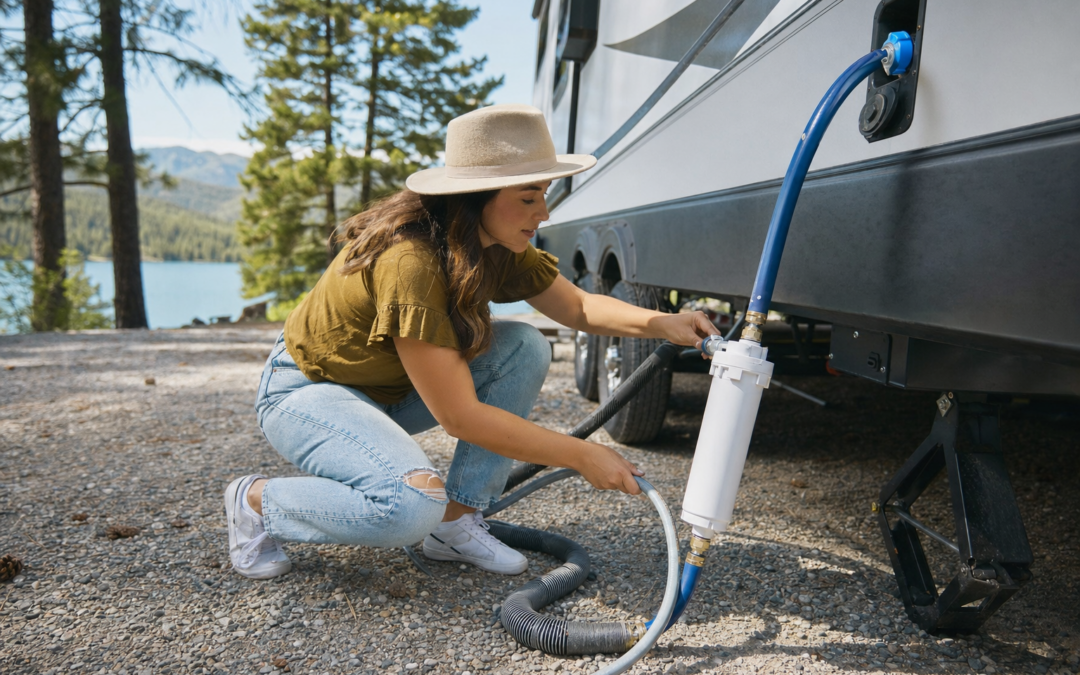
Whether you’re new to RVing or looking to improve your water setup, having a safe and efficient potable water system is essential for every camper. At many campgrounds across the US, potable water hookups are available, but the quality and taste can vary greatly. Setting up your RV with the right water hose and filter ensures clean, safe water for drinking, cooking, and cleaning—without the risk of contamination or unpleasant odors.
In this guide, we’ll break down the key components of an RV water hose and filter setup for potable campgrounds. You’ll learn how to select the right hose, why filters matter, how to connect everything properly, and tips for maintenance. We’ll also point you to practical camper gear recommendations for a smoother camping experience, focused specifically on water hoses and filters.
Understanding Potable Water at Campgrounds
Most developed campgrounds in the US offer “potable” water hookups, which means the water is designated as safe for human consumption. However, “potable” is a minimum standard. The water may be chlorinated, have a noticeable taste, or pick up contaminants from old pipes and fittings. Seasonal maintenance, local water sources, and infrastructure age can all affect what comes out of that spigot. That’s why even at potable sites, most RVers choose to use a dedicated drinking water hose and a filter.
Choosing the Right RV Water Hose
Not all hoses are created equal. Standard garden hoses are not suitable for drinking water—they can leach chemicals, impart unpleasant flavors, and aren’t rated for potable use. Instead, look for hoses labeled “drinking water safe” or “potable water hose.” These hoses are typically made from materials free of lead, BPA, and phthalates, and are certified to NSF/ANSI standards for drinking water safety.
- Length: Most RVers find that a 25-foot hose covers most campground setups. Some carry an extra 10- or 25-foot extension for awkwardly placed spigots.
- Diameter: 5/8-inch hoses deliver better flow than 1/2-inch, especially if you use an inline filter.
- Flexibility: Look for hoses that remain flexible in cold weather and resist kinks for easier setup and storage.
- Fittings: Brass fittings are more durable than plastic and reduce the risk of leaks.
Routinely inspect your hose for cracks, mildew, or discoloration, and replace it every few years or if you notice any off smells or tastes.
Why You Need a Water Filter for Your RV
Even if the campground advertises potable water, sediment, chlorine, and other contaminants can slip through. An RV water filter protects your family and your plumbing system. Filters can:
- Remove sediment, rust, and silt that clog fixtures and damage appliances
- Reduce chlorine taste and odors for better-tasting water
- Filter out bacteria, protozoa, and in some cases, viruses (depending on the filter type)
- Extend the life of your water heater and faucets by reducing mineral scale
There are several filter types to choose from. Most RVers use a simple inline filter for general use, but many opt for multi-stage systems or portable gravity filters for higher protection—especially when traveling to unfamiliar areas.

BKLES 3-in-1 Water Filter System for Survival Gear & Emergency Preparedness Review — Practical water filters from BKLES, summarized from hub features and listed measurements. Key figures include 3, 1 , 800.
Types of RV Water Filters Explained
Let’s break down the main types of water filters you’ll encounter for RV use:
- Inline Canister Filters: These attach directly to your hose, filtering water as it enters your RV. They’re easy to use and replace, and typically reduce sediment, chlorine, and some contaminants. Many are good for a camping season or a set number of gallons.
- Multi-Stage Canister Systems: These larger systems combine sediment, carbon, and specialty filters for broader contaminant removal. They’re installed at the water inlet or inside the RV, and offer better flow and filtration for full-time RVers.
- Gravity Water Filters: Portable gravity-fed filters are ideal if you’re filling your fresh tank from questionable sources or want backup purification for boondocking. They remove bacteria and protozoa, and some can even filter viruses or heavy metals.
- Compact Emergency Filters: Handy for emergencies or off-grid camping, these can treat small amounts of water on demand.
The best filter for you depends on your travel style, number of people, and typical water sources. For most campers at potable campgrounds, an inline hose filter plus a backup gravity filter offers reliable protection.

Gravity Water Filtration System Review — Practical water filters from Practical Survival, summarized from hub features and listed measurements. Key figures include 99.99, 1 , 8 .
How to Set Up Your RV Water Hose and Filter
Setting up your water hose and filter at a campground is straightforward with the right gear:
- Connect the Filter: Attach your inline filter to the campground spigot first. If using a gravity filter, fill it separately and transfer the clean water to your RV’s fresh tank.
- Attach the Hose: Connect your potable water hose to the filter’s output side. Ensure all fittings are tight but avoid overtightening, which can damage threads.
- Use a Pressure Regulator: Many campgrounds have high water pressure, which can damage RV plumbing. Attach a pressure regulator (set to 40–50 psi) between the spigot and the filter for protection.
- Connect to Your RV: Attach the other end of the hose to your RV’s city water inlet. Double-check for leaks at every connection.
- Flush the System: Run water through the hose and filter for a minute before connecting to your RV. This clears out any residual carbon dust or debris from the filter.
Tip: Always use a white or blue hose for drinking water, and store it separately from any hose you use for flushing tanks or rinsing gear. Label hoses if needed to avoid cross-contamination.
Maintaining Your RV Water Hose and Filter
Regular maintenance prolongs the life of your gear and ensures safe water every trip. Here’s what to keep in mind:
- Drain and Dry: After each trip, drain the hose and let it dry completely before storage to prevent mold and mildew.
- Clean Fittings: Wipe down hose ends and filter connections to keep dirt and bacteria at bay.
- Replace Filters: Follow the manufacturer’s guidelines for filter replacement. Most inline filters are good for 3–6 months or a set gallon count. Gravity filters need cleaning or cartridge replacement as specified.
- Inspect for Damage: Check for cracks, swelling, or leaks in hoses and filter housings. Replace damaged components immediately.
- Sanitize the System: At least once per season, sanitize your RV’s entire fresh water system (tanks, lines, and hose) with a diluted bleach solution. Rinse thoroughly before use.
Store your hose and filter in a clean, dry compartment, ideally in a sealed bag or container to keep out dust and critters.
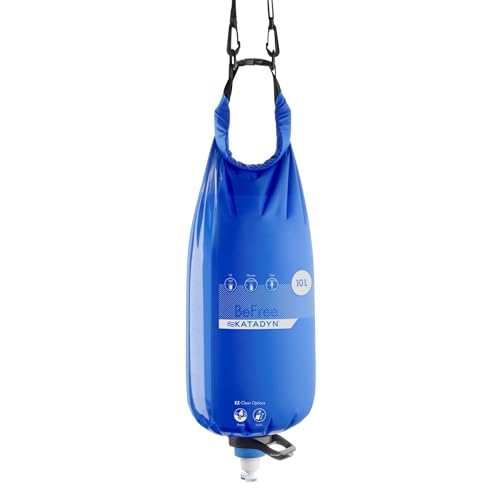
Katadyn BeFree Gravity Water Filter 10L for Base Camp & Large Groups Review — Katadyn water filters gear aimed at buyers who want clear specs before they click through. Key figures include 0.1 , 2 , 8020860.
Common Mistakes to Avoid with RV Water Setups
Even experienced campers sometimes make mistakes with their water setup. Here are a few common pitfalls and how to avoid them:
- Using a Garden Hose: Never use a standard green garden hose for drinking water. These aren’t rated safe for consumption and can impart plastic flavors and chemicals.
- Skipping the Filter: Don’t assume “potable” means perfect. Always use a filter to protect your health and your RV’s plumbing.
- Cross-Contamination: Don’t use the same hose for black/gray tank flushing and drinking water. Even a quick rinse can transfer bacteria.
- Neglecting the Pressure Regulator: High pressure can burst RV pipes and fixtures. Always use a regulator at unfamiliar campgrounds.
- Improper Storage: Storing hoses in damp, dirty areas encourages mold and bacteria growth. Let hoses dry and keep them sealed between trips.
Small precautions make a big difference in water safety and taste.
Tips for Better-Tasting Water in Your RV
Even with a filter, some campground water can have a strong taste or odor. To improve your RV’s water quality:
- Change Filters Regularly: Old filters can become saturated and ineffective, allowing tastes to return.
- Flush New Hoses and Filters: Always run water through new gear to remove manufacturing residues.
- Use Activated Carbon: Many inline filters include activated carbon, which absorbs chlorine and organic compounds for fresher-tasting water.
- Keep Your Fresh Tank Clean: Sanitize your tank regularly and avoid leaving water sitting for weeks between trips.
- Store Water in Clean Containers: If you fill bottles or a jug, wash them frequently to avoid stale or musty flavors.
If you’re sensitive to taste, consider a dual-stage filter system or portable gravity filter for drinking and cooking water.
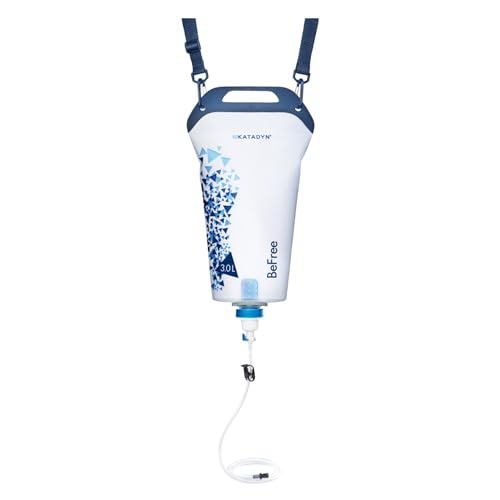
Katadyn BeFree Gravity Water Filter 3L for Camping Review — An editorial look at this Katadyn option for water filters — specs first, marketing second. Key figures include 0.1 , 2 , 8020470.
How to Handle Non-Potable Water Sources
Some campgrounds and boondocking sites only offer non-potable water, marked as “not for drinking.” Never connect your drinking water hose or fill your fresh tank from a non-potable source unless you have a robust filtration and purification system. For occasional use, follow these steps:
- Use a Gravity Filter: Portable gravity-fed filters can remove bacteria, protozoa, and even viruses from questionable sources. Fill the filter bag with non-potable water and collect the filtered output in a clean container.
- Pretreat as Needed: If water is especially dirty, let sediment settle first or pre-filter with a coffee filter or cloth.
- Sanitize if Unsure: For complete protection, especially in remote areas, add water purification tablets or boil water after filtering.
- Never Use Non-Potable Hoses for Drinking Water: Keep a separate, clearly labeled hose for these tasks, and never connect it to your potable system.
Always err on the side of caution—filter and purify any water you suspect may be contaminated.
RV Water Filters: Gravity vs. Inline—Which Is Better?
Both gravity and inline filters have a place in your RV setup, but each shines in different scenarios:
- Inline Filters: Best for everyday use at campgrounds with potable hookups. They’re convenient, filter all incoming water, and protect your plumbing and appliances. They’re limited by flow rate and the contaminants they’re rated to remove.
- Gravity Filters: Ideal for backup, off-grid, or when filling from lakes, wells, or questionable spigots. They can offer higher levels of filtration (including protozoa and bacteria), but require manual filling and aren’t as convenient for continuous use.
Many RVers carry both: an inline filter for routine use and a gravity filter for emergencies or off-grid adventures. Choose based on your route, risk tolerance, and water quality concerns.
Traveling with Water: Filling and Storing Safely
If you plan to camp at sites without hookups or want to fill your fresh tank before arrival, follow these steps for safe storage:
- Always Fill with a Filter: Even when filling your tank at home, run water through your inline or gravity filter to reduce contaminants.
- Don’t Overfill: Water adds weight, which affects fuel economy. Fill only as much as you’ll need for the next leg of your trip.
- Keep the Cap Clean: Wipe the tank fill port and cap before connecting your hose to avoid introducing dirt.
- Sanitize Regularly: If your water sits for weeks, sanitize the tank before refilling for fresh taste and safety.
- Monitor Water Levels: Use your RV’s tank monitor or check manually to avoid running dry or overflowing.
Never store water in your tank long-term. Use and refresh it regularly to avoid stale or contaminated water.
Essential Accessories for Your RV Water System
To complete your potable water setup, consider these must-have accessories:
- Water Pressure Regulator: Protects your RV’s plumbing from high campground pressure.
- 90-Degree Hose Elbow: Prevents kinking at the RV connection and reduces strain on fittings.
- Quick Connects: Make setup and breakdown faster and reduce wear on hose threads.
- Inline or Canister Filter Housing: If you upgrade to a multi-stage system, you’ll need a dedicated housing mounted near your inlet.
- Hose Storage Bag or Reel: Keeps your potable hose clean and organized between trips.
- Dedicated Filling Funnel: Handy for transferring filtered water from a gravity system to your tank without spills.
Shop for these and other essentials in our recommended camper gear listings for reliable options tested by real RVers.
Conclusion: Set Up Once, Drink Safely Every Time
Setting up a safe and efficient RV water system doesn’t have to be complicated. With a dedicated potable water hose, a quality filter, and a few smart accessories, you can enjoy clean, great-tasting water at any campground. Remember to maintain your gear, avoid cross-contamination, and always filter—even at “safe” hookups. The extra peace of mind is worth it for every trip.
For more tips, gear recommendations, and detailed reviews of water filters and hoses, visit our main camper gear hub before your next adventure. Safe travels and happy camping!
RV Water Hose and Filter Setup Checklist
- Drinking Water Safe Hose: Confirm your hose is labeled for potable water use and is the right length for your needs.
- Water Pressure Regulator: Attach a regulator to the spigot to prevent damage to your RV plumbing from high pressure.
- Inline or Multi-Stage Water Filter: Choose and install a filter appropriate for your water quality concerns.
- Brass Hose Fittings: Use durable brass connectors to minimize leaks at both ends.
- Quick-Disconnect Fittings (optional): These make setup and breakdown faster and cleaner.
- Clean Storage Bag: Store your hose and filter in a bag or container labeled “fresh water only” to avoid contamination.
- Gloves: Wear disposable gloves when handling campground spigots or hoses to prevent transferring germs.
- Dedicated Water Fill Attachment: Use a separate attachment or funnel for filling your fresh tank if needed.
Keep this checklist handy and run through it before every hookup to ensure you’re set up for safe and clean water at every stop.
Common Mistakes When Setting Up Your RV Water Hose and Filter
- Using a Garden Hose: Garden hoses are not rated for drinking water and can leach harmful chemicals and unpleasant tastes into your water. Always use a certified potable water hose.
- Skipping the Water Pressure Regulator: High campground water pressure can burst pipes or damage fixtures. Always use a regulator rated for RV use.
- Improper Filter Installation: Installing the filter backwards, or forgetting to flush a new filter before use, can reduce effectiveness or introduce contaminants.
- Storing Hoses Improperly: Storing your fresh water hose with sewer hoses or on the ground can lead to contamination. Always use a separate, clean storage method.
- Neglecting Hose and Filter Maintenance: Failing to regularly clean or replace your hose and filters can lead to mold, bacteria buildup, and foul-tasting water.
- Forgetting to Bleed Air: Not running water through the system before use can result in spurting, cloudy water, or airlocks in your plumbing.
Avoiding these mistakes will help maintain a safe and reliable water supply throughout your travels.
Maintenance Tips for RV Water Hoses and Filters
Proper maintenance extends the life of your RV water system and ensures consistently clean water. Here are some essential tips:
- Flush the Hose Regularly: Before each trip, run clean water through your hose to rinse out any stagnant water or debris.
- Sanitize Seasonally: At least once per camping season, sanitize your hose and water system with a diluted bleach solution, then rinse thoroughly before use.
- Replace Filters as Recommended: Follow the manufacturer’s guidelines for filter replacement—typically every 3-6 months or after a certain number of gallons.
- Inspect for Damage: Check hoses and fittings for cracks, bulges, or leaks. Replace damaged parts promptly to avoid water contamination.
- Dry Before Storage: Allow hoses and filters to drain and air dry completely before storing to prevent mold and mildew growth.
- Store Out of Sunlight: UV rays can degrade hose materials; store hoses in a shaded compartment or bag.
Routine maintenance prevents unpleasant surprises and ensures your water always tastes fresh and clean.
Frequently Asked Questions About RV Water Hose and Filter Setup
How often should I replace my RV water filter?
This depends on the filter type and your water usage. Most inline filters are rated for 3-6 months of use or a specific number of gallons (often 20,000). If you notice a drop in water pressure, unpleasant taste, or discoloration, replace the filter sooner.
Can I use the same hose for drinking water and flushing my black tank?
No. Always use a separate hose for flushing your black tank or sewer system. Store hoses in clearly labeled containers to prevent cross-contamination.
Do I need a water pressure regulator at every campground?
Yes, it’s a good precaution to use a water pressure regulator every time you connect to a campground spigot. Water pressure at campgrounds can vary and sometimes exceed safe levels for RV plumbing.
What do I do if my hose develops a strong plastic or chemical smell?
If your hose develops an odor, it may be due to age, sun exposure, or contamination. Try flushing and sanitizing the hose, but if the smell persists, replace it with a new drinking water safe hose.
Can I leave my water filter installed all season?
If you camp frequently, it’s fine to leave the filter installed, but always disconnect and drain it during freezing weather to prevent cracking. If you won’t use your RV for several weeks, remove and dry the filter as recommended by the manufacturer.
What’s the best way to prevent hose kinks and tangles?
Choose a hose designed for flexibility and kink resistance. When storing, coil the hose loosely and avoid sharp bends. Some RVers use hose reels or storage bags to keep things organized.